Shooting, hunting, and observing are all forms of art that require a skill. To hit a bulls-eye, you need to be patient and precise. However, you don’t have to do this difficult task on your own. It’s time to say goodbye to ignorance if you’re one of those hunter types.
Learn how to shoot with a scope, how to set it up, and how to choose one if you’re in the market for one.
Despite the fact that many hunters are confused about the spotting scope’s role in hunting. But this is actually quite simple.

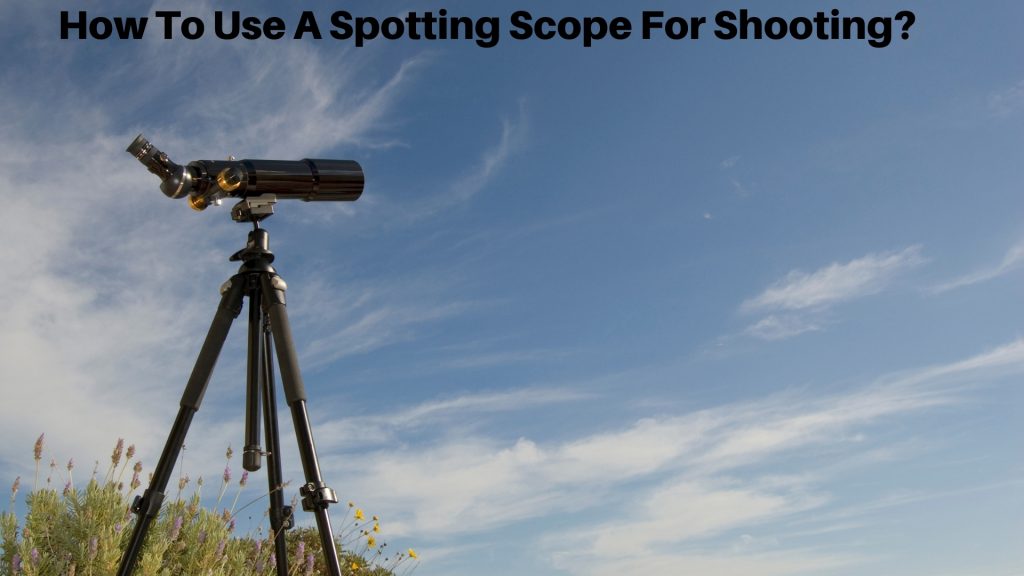
What Is A Spotting Scope & What Is The Benefit Of It?
It is a smaller telescope that uses the same mechanisms for forming an image as a large telescope. Spotting scopes, on the other hand, produce a more upright image than astronomical scopes. As a result, using a product like this becomes easy.
The lenses on such a product are better against humidity, refraction, and dust, making it ideal for daytime use. Telescopes have a high magnification. So, in order to adjust to 20x or 60x, which is the optimal range for shooting, you have to change a lot of specifications.
It’s much easier to adjust and use a spotting scope. A binocular is a useful tool, but this product has a lot more to offer than that. Wide objective lenses, reticles, angled features, and much more are included in scopes of all kinds.
In general, a spotting scope is the best purchase for shooting and observing nature in general. It’s not uncommon for beginners to ask questions about using a product after they’ve purchased one. We’ve put together a step-by-step guide to help you get your problem solved.
What Is The Role Of A Hunting Spotting Scope?
- Set up your binoculars and search the area for the herd.
- Replace your binoculars with a hunting spotting scope once you’ve located them to get more information and a closer look.
- Use the spotter to get information about the size of the rack, the gender, and anything else you need to make sure you’re shooting legally.
- To determine the distance, use your laser rangefinder.
- Adjust the turrets on your rifle scope and fire the shot.
- You complete the mission.
How To Set Up A Spotting Scope?
As a beginner, you’re probably looking for information on how to use a spotting scope and how to set one up. If this is the case, you’re in right place.
Bear in mind that these are generic instructions for the most commonly used tripod and spotting scope. Consult your user manual or contact the manufacturer if yours is a little different.
Choose The Perfect Position
Start by getting a general idea of where you want to go. Decide where you want to go by observing a wider area of possibilities. In the case of photography or hunting, this step is crucial. As a result, the target is right in front of you if you are shooting in a small area. As a result, you are aware of the object’s location at all times. Check our article on the best hunting tripod.
Adjust Your Position
Set up your rifle first because you will be shooting with it. Continue by adjusting yourself to the new situation. Sitting or laying down will always produce better results than standing or walking around. So, set up a chair and make sure it’s stable. Check to see if the chair is grounded before using it. To protect yourself from dust or cold, consider using a mat underneath.
Take A Measurement Of Your Distance
Keep your distance from the scope as small as possible. As a result, you must adjust your rifle’s range and the spotting scope’s range. As long as the distance between the two tools is the same, there will be less need to move. A large part of the energy that you will need for patience will be preserved as a result of this.
Make The Scope More Stable
For an accurate image, you don’t want your scope to be shaky. High magnification of over 20x will be impossible to focus on with an unstable scope. There is a solution to this dilemma. Buy the best spotting scope tripods.
As long as you mount your scope on the tripod, you’re good to go. Then, tighten the bolts and place the tripod on a flat surface, ensure its level.
Set The Magnification Level
Each product has maximum magnifying power. Decide on a scope that meets your needs even before setting the magnification. You should use the rotating portion of the spotting scope to adjust the magnification after the device has been mounted on the tripod. It’s similar to the settings on a digital camera.
Most scopes have a standard range of 20-60x. In other words, you can play around with the settings until a clear picture comes up.
Improve Your Concentration Or Focus
Focus is the next step. While this function is the same as setting the magnification, it will produce a crystal clear image if it is done correctly. Because the focus is different for different distances, you’ll need to adjust your camera’s focus as necessary.
Proper Maintenance
The maintenance of the scope is one of the first steps to knowing how to use the scope in the first place. A high-quality lens and reticles make this product susceptible to damage. So, keep it away from moisture and store it in a dry place. Using a spotting scope case will help to protect the product.
How To Tilt And Pan The Scope?
Tilt and pan are only possible after unlocking the tilt and pan locks. Using the levers or locks on the tripod can be done easily. For example, some newer tripods have a locking mechanism integrated into the handle. It is possible to lock the handle in place by turning it clockwise, and if it has that ability, untwisting it will release it.
Keep in mind that you should never tilt or move the spotting scope itself. You can move the pan around by pulling the handle.
Prepare Your Scope For Use
To access the objective lens, eyepiece, and focus controls on a telescope with a stay-on cover, remove, unzip, or pull down the parts of the cover to reveal them. There may still be caps on the spotting scope, so remove them.
Locating Your Targets
Set your magnification to a low setting, and then focus your image for sharpness and a wide field of view. You can focus by moving the focus controls and turning them until the image is crystal clear and crisp.
- Use your hands to fold or twist the eyecups until you have enough eye relief if wearing glasses.
- Retract your spotting scope’s sunshade if the sun is directly in front of you and not behind you.
- If you haven’t already done so, scan for targets with binoculars, using the panhandle to see the landscape.
- Once you’ve located your targets at low magnification, turn the zoom ring to increase the magnification until you reach your desired view.
- Repeat refocusing as necessary until you have a sharp, clear image on the screen.
Tip For A Newbie
With a spotting scope, use the lowest magnification first for the widest field of view when searching for targets. In addition to reducing your field of view, increasing your power range also reduces your field of vision.
However, despite the fact that the instructions appear to be lengthy, it’s really not as difficult as it sounds. Fluidity and efficiency will become second nature with practice and the use of some very convenient accessories.
For those who want more magnification power than binoculars, but don’t want to deal with the “set-up” process, a compact, somewhat hand-held scope may be a better choice.
Camera And Digiscoping Adapters
You’ve been searching for an elk or moose for years, but you’ve never managed to get a photo or video of it. Some people prefer to share a piece of the mountains they hiked through. For example, you may want to capture a breathtaking moment of the sun setting before you leave.
Spotting scopes with camera adapters allow you to do all of that and more. For the most part, most hunters don’t care about the camera adaptability of their spotting scopes. Some outdoor enthusiasts, on the other hand, do care about the environment. Let me share with you some spotting scope and digiscoping tips that I’ve learned over time.
Your camera and scope must be compatible for a good fit. On “non-digiscoping spotting scopes,” many universal phone and camera adapters that snap on might work.
Set Your Camera Adapters For Spotting Scope
Spotting scopes are typically camera-compatible. To take pictures, all you need is an adapter that can be attached to the spotting scope, and voila. The Camera adapters, on the other hand, come in a variety of shapes, sizes, and designs.
There are many adapters such as adapter rings, Universal phone mounting adapters, Point-N-Shoot adapters, DSLR adapters, Specific iScope iPhone adapters, Compact camera adapters, System cameras (hybrid of DSLR and compact camera) adapters, etc.
There are some adapters that are simple to use. MeoPix, for example, helps make an iPhone 4S/4C adapter. The Meopta spotting scope’s eyepiece is simply snapped onto the eyepiece.
There is also a mounting bracket on the adapter to hold the iPhone’s camera perfectly aligned with the exit pupil of the adapter. Digital camera adapters from Leupold, for example, snap onto the lens of a digital camera without any additional tools or attachments.
Other adapters need to be put together. You need an eyepiece attachment, a lens adapter, and a third adapter to connect the whole assembly to the camera. For instance, take a look at Swarovski’s system.
For those who can afford it, enjoy the scenery and use your trigger finger on something other than your rifle’s trigger.
How To Choose The Right Spotting Scope?
Budget
When it comes to quality and price, the first question to ask is “How much can you afford?” This depends on you. When you going to buy a spotting scope, you may want to get the best spotting scope. If your budget is high and you know about the spotting scope you’re good to buy.
First and foremost, one would expect a difference in optical quality. Cheaper scopes offer good images at lower magnifications (15-30x), which may be sufficient for your needs in the long run. Increasing the magnification results in a degradation of image quality. The image of a high-quality scope, on the other hand, remains sharp and bright at 60x and beyond.
Higher-priced scopes incorporate new lens coatings and glass formulae for the highest light transmission, sharpest details, and color clarity as technology progresses.
Size Of The Objective Lens And The Body Style
It follows that if you have identical optics in different shapes and sizes that your next question is, “Is it better to have a curved or a straight body? A 65mm lens or one that is 80 millimeters in diameter?”
Search for a big lens if you’re looking at a long-distance or in low light. So that you can gather more light. The smaller, lighter, and easier-to-carry 60-65mm lens sizes are more convenient.
An angled body scope has the advantage of being able to lower the tripod so that people of different heights can easily view it. Because the eyepiece is lower on an angled body than it is on a straight body, children can view without having to lower the tripod.
When using a car window mount, this also allows for a comfortable position. They’re easier to use when you’re primarily looking down from a higher position.
Strength Of The Spotting Scope
As soon as you have decided how much optical performance you can afford, you have to think about how durable the scope will be in the field. It’s always a plus if your spotting scope is waterproof and fog proof, regardless of what you’re doing.
The efforts that are more demanding require a well-defined spotting scope. Your budget has an impact on the scope’s durability just like optical quality. Consider the manufacturer’s warranty. Investing in a product that has a longer warranty is a wise decision.
The Tripod Foundation
You’ve figured out the perfect spotting scope. It is only as good as the tripod you use that determines how good your experience with your scope will be. By choosing a cheap plastic tripod, you’re putting your decision and the scope’s performance at risk.
At the very least, you’ll need a sturdy aluminum tripod for your camera. Despite the fact that aluminum tripods offer good stability at an affordable price, they can be heavy.
Carbon fiber tripods are a good option if you’re going to be carrying your equipment for long distances or for extended periods of time. While lighter, carbon fiber tripods are also more vibration-dampening than other types of tripods. If you’re using a spotting scope at higher magnifications, this is especially important.
Final Words
With a little practice, you’ll become an expert at using the product once you know how to set and use it. After all, using a scope isn’t all that difficult. It’s time to start using your scope now that you’ve read this article.


